How to use condenser microphone? So many of us are currently getting stuck into home recording. For some of us, it is all a new experience. So, it is important to make sure you’ve got the right tools for the job at hand. You may already have access to a dynamic microphone for recording demos. However, a decent large diaphragm condenser microphone (or LDC) could be the missing link in your makeshift lockdown studio. Let’s have a look at what an LDC microphone is, and answer the question – how does a condenser microphone work? We will take a look at some handy tips and techniques, and compare 5 of the best options currently available.
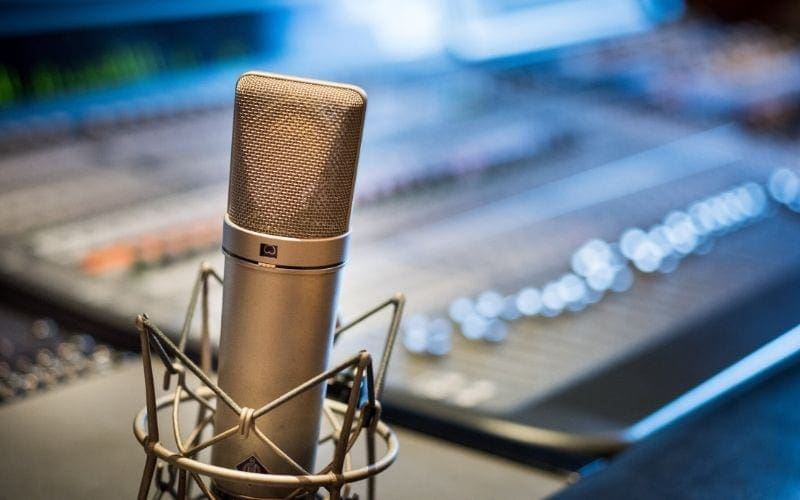
What Is A Condenser Microphone?
Most studio mics that you will encounter fall into one of three construction types: dynamic, condenser or ribbon. Condenser microphones will give you more detail and clarity, and are optimal in capturing a wider frequency range. Condensers often have the advantage of features such as switchable polar patterns, level attenuation pads and EQ filters.
Polar patterns detail the directional sensitivity of a microphone, and can suggest the optimal placement for the mic. The most common polar patterns are cardioid (AKA unidirectional), bi-directional (AKA figure-of-8) and omnidirectional. Some condenser mics will have further variations, such as hyper-cardioid/super-cardioid. Some offer a variable control to select incremental stages in-between.

Level pads allow you to attenuate the microphone’s sensitivity. You may wish to record sources that would otherwise cause the microphone to distort (e.g. close drum mics, guitar amps). Typical pad switch values attenuate the microphone from 0dB down to -10dB or -20dB. This should be sufficient for recording loud signals without issue. You’ll see how attenuating the mic changes the level coming into your recording device. So you will need to set your input gain level accordingly.
Filter Switches
The filter switch is a tool that shapes the frequency content of the mic signal. The one that you will find most commonly on a large diaphragm condenser microphone is a lo-cut switch (also known as a hi-pass or low frequency roll-off). This switch will cut off the low end (80Hz and below), and allow higher frequencies to pass through unaltered. This can help in reducing any rumble, and prevents a build up of low frequency energy in your recording. For example, a guitar in standard tuning goes down as low as 82 Hz. So, you may wish to use the filter to remove any frequencies below that to keep the signal clean. Be sure to turn off the filter (straight symbol) when recording bass, kick drums or low piano parts as you may lose important details in the bottom end.
What Does The Inside Of A Condenser Microphone Look Like?
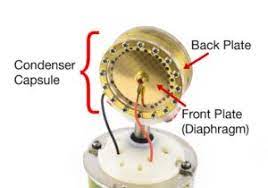
The inside of a condenser microphone typically consists of a thin metal diaphragm, a backplate, an amplifier, and a circuit board. The diaphragm is the part that vibrates when sound waves hit it, which in turn creates an electrical signal.
The backplate is a metal plate that is opposite the diaphragm and helps to create a static electric field. The amplifier amplifies the signal created by the diaphragm and the backplate. The circuit board is where the signal is processed and then sent to the output.
Here are some images below so you can see for yourselves.

How To Use Condenser Microphone
Sound travels in waves via the contraction and expansion of molecules, much like the ripples that are caused by dropping a stone in a pond. This journey (or ‘propagation’) of acoustic energy is visually represented by waveforms where the ‘compression’ is shown as a peak and the ‘rarefaction’ by a dip.

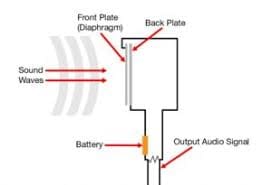
All microphones are ‘transducers’ that transform acoustic energy into electrical signals. The capsule of a condenser microphone (also known as a capacitor microphone) relies on the change of voltage between two internal plates to provide a signal. Unlike a dynamic mic, which uses a simple moving coil system (essentially a speaker in reverse), a capacitor mic requires the supply of a constant voltage to function properly. This is known as ‘phantom power’, and is usually supplied from an external PSU, or directly by your interface or mixing desk.
Of these two internal plates, the front one is a thin membrane that reacts to changes in air pressure. This ‘diaphragm’ moves in responsiveness to sound and the deviation in distance from the backplate. This causes a charge (increase in capacitance) or discharge (decrease in capacitance). This difference in charge creates a current that mirrors the compression and rarefaction of the original acoustic signal and this electrical signal is what we record.
Difference Between Condenser Vs. Dynamic Microphones
A condenser microphone is a type of microphone that uses electrical current to convert sound into an electrical signal. It is more sensitive than a dynamic microphone and is typically used for recording applications. Condenser microphones are more expensive than dynamic microphones, but they are also more accurate and provide a better sound quality.
Dynamic microphones, on the other hand, use a diaphragm to convert sound into an electrical signal. They are less sensitive than condenser microphones and are usually used in live sound applications. Dynamic microphones are generally less expensive than condenser microphones, but they are not as accurate or provide as good a sound quality.
How To Use Condenser Microphone – Recording Techniques

The cardioid pattern we often see is designed to pick up from the front of the mic (tip – this is almost always the side with the manufacturer’s logo on it). This pattern is the fastest route to achieving a good recording with a LDC – particularly if your room is not the best acoustic environment. it will help reject reflections and noise entering from behind and, to a lesser degree, from the sides of the mic.
The ‘proximity’ effect is an inherent issue with a cardioid mic. This is when the low end response becomes increasingly amplified the closer the source gets in relation to the capsule. It can be really nice for getting rich, deep vocal tones so it is by no means a negative thing. However, it is still a phenomenon to be aware of.
Capturing The Room
To capture the room in your recording, you should look at the omnidirectional setting (depicted by a circle). This picks up sound from all around, with equal sensitivity, and is captures the life of a performance. It can be useful when recording a vocal or instrument in a room with great acoustics. This way, you will capture the natural reverb along with the sound from the vocalist.
Separation Between Instruments
The obvious benefit of the figure of eight pattern is that it allows you to record two sources. I would recommend placing them opposite at the front and back of the same mic. This will reject sounds that are present at the sides. For example, two singers facing each other with the mic in between, or a host interviewing a guest.
This pattern is really useful when you are trying to achieve separation between instruments in a live situation. You will always get ‘bleed’ between mics when recording a performer who sings and plays guitar at the same time. But, with careful placement, you can use the microphone’s pickup pattern to minimise this. A good example would be to angle the mic so that it faces the guitar. Then, you should make sure that its null point (the least sensitive area) is aimed at the singer’s mouth for maximum vocal rejection. Finally, position a second mic close to the singer’s mouth, with the null point aimed at the guitar.
Pros & Cons Using A Condenser Microphone
The main benefits of using a condenser microphone are its accuracy and sensitivity. Condenser microphones are able to capture a wide range of frequencies, from the high-end treble to the low-end bass. This makes them ideal for capturing vocals, instruments, and other sound sources with high clarity and detail.
The capsules in condenser microphones are also very sensitive, which allows them to pick up even the slightest sound.
However, we must mention the drawbacks of using a condenser microphone. Firstly, they can be expensive, and they require a power source (usually phantom power).
Condenser microphones also tend to pick up more background noise than dynamic microphones, so they may not be the best choice for recording in noisy environments. Additionally, condenser microphones can be more fragile than dynamic microphones, so they may not be the best choice for live performances.
How To Use Condenser Microphone – Which Are the Best?
Top 5 Large Diaphragm Condenser Microphones
Audio Technica 2020
Price: Around £84.00
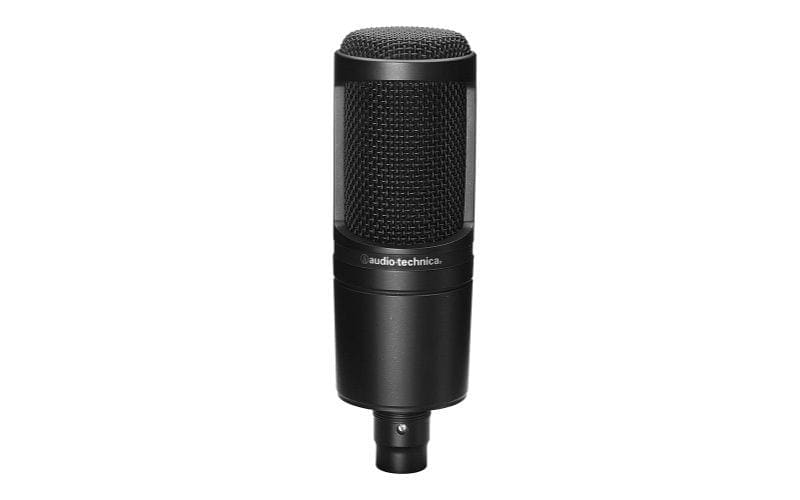
Audio Technica have made a great name for themselves as a reliable music technology manufacturer. At well under £100, the AT2020 is superb value for money. It is a large condenser mic that is ideal for the budget conscious and can deliver professional results.
This microphone provides detailed clarity with its precision-made 16mm low-mass diaphragm. Audio Technica specify a frequency response of 20Hz all the way up to 20,000Hz. This means that it comfortably covers the entire range of human hearing. The AT2020 can accommodate levels as loud as 144 dB SPL (sound pressure level), with a dynamic range of 124 dB. This microphone is therefore well suited for a variety of recording applications. It is equally great for recording voice, percussion, piano, brass, winds, Leslie amp or guitar.
This microphone model comes with a fixed cardioid polar pattern (as is to be expected with more affordable microphones). The AT2020 comes with a solid AT8466 mount attachment as standard. The addition of an elasticated suspension mount would be a good investment to ensure your perfect take isn’t ruined by vibration travelling up your mic stand.
Rating: 2/5
sE 2200
Price: Around £198.00
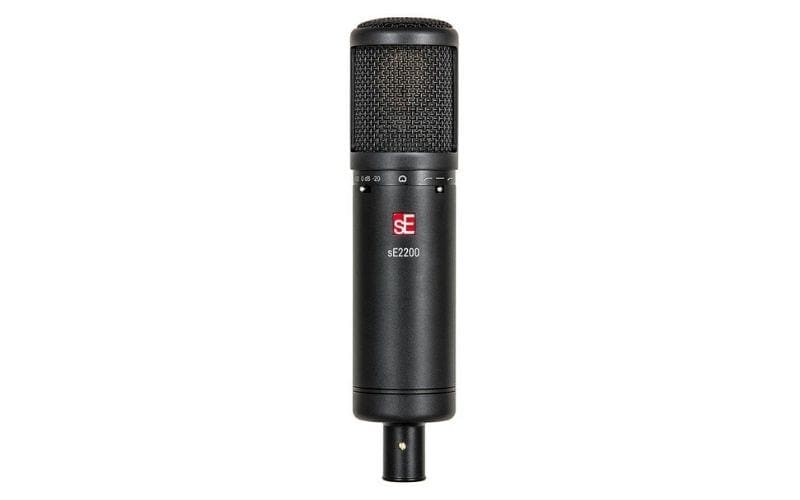
The current sE 2200 is a revised version of the original, and now comes in a sleek black all-metal chassis. This microphone’s all-metal build rejects electrical interference, and the signal path has been optimised to provide less self noise.
The sE2200 in also a cardioid only LDC, but there are a few additional features that the AT2020 lacks. A 3 position pad switch offers attenuation options of 0dB, -10dB and -20bB. This gives a wider dynamic range of 117dB, 127dB or 137 dB, and a selectable max SPL of 125dB, 135 dB or 145 dB. The gives a wider option of suitable recording applications. There is a 3 position lo-cut switch, which allows filtering of frequencies below 80Hz or 160Hz. This is great for reducing rumble or to help offset the proximity effect. The sE2200 comes with a shock-mount as standard and its gold-plated XLR connector is designed to provide a superior signal connection.
The sE 2200’s frequency response is pleasantly neutral, but it has a slight presence boost between 3-6kHz. Flattering the source that is being recorded, this microphone has a hi end peak at around 15kHz. This could, however, be too harsh for some ears.
Rating: 3/5
Aston Spirit Multi Pattern
Price: Around £449

Aston Microphones are a relatively new company on the scene. These British-made mics have caused quite a stir with their unique design, and are quickly building a good name for themselves for their reputable quality. The remarkable wave-form spring head provides a degree of protection to the mic and has a mesh-knit pop filter built in to prevent plosives (‘P’s’ and ‘B’s’) from causing distortion.
The Aston Spirit is a switchable pattern LDC with omni, cardioid or figure-of-eight polar pattern options. It comes with a pad switch offering attenuation at -20dB, -10dB or 0dB, and boasts an impressive 138dB max SPL. The low pass filter is set at 80Hz and the mic exhibits a subtle boost around 10kHz to give a touch of air. Although this mic can be used with a suspension mount, it does already comes fitted with an internal shock absorption system. The universal stand thread adaptor means that it can be mounted directly onto a microphone stand.
The Spirit was developed with a team of 33 of the UK’s top producers and recording engineers, and is suitable for a variety of recording applications. It is especially ideal for recording vocals or acoustic guitar.
Rating: 5/5
AKG C414XLS/XLII
Price: Around £788.00
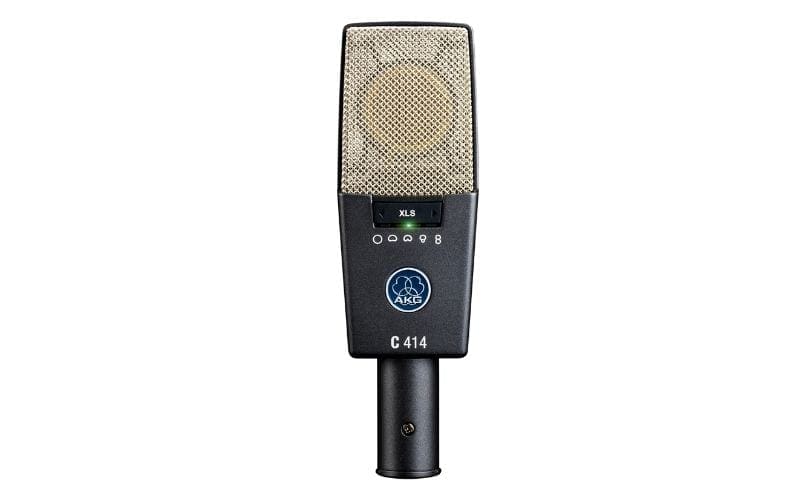
An iconic microphone used in professional and home studios globally is the AKG C-414. Over the years, there have been a number of variants of this model, and some of the older models such as the C414B-ULS and the C414B-TLII are revered on account of their sonic characteristics. Particularly sought after is its predecessor, the C414EB (particularly the early C414EB models with a brass capsule).
The modern day C414-XLS and C414-XLII are based on the C414B-ULS and the C414B- TLII microphones, but come with a host of design improvements. They have a huge selection of nine polar patterns including Omnidirectional, Wide Cardioid, Cardioid, Hypercardioid, and Figure of Eight as well as 4 in-between stages. A peak hold LED indicator displays any overload peaks you may encounter, and the pad switch offers attenuation at 0dB, -6dB, -12dB & -18dB to counter those peaks. The low frequency roll-off can be engaged at 40Hz, 80Hz or 160Hz.
The C-414 ships with a number of accessories, including a H85 universal shock mount, a PF80 pop filter and a W414 windscreen. These are all contained in a metal carrying case. While both are exceptionally good mics, the brighter sound of the C414-XLII works well to complement lead vocals. Neutral acoustic instruments, however, suit the darker sound of the C414-XLS.
Rating: 4/5
Neumann U87Ai
Price: Around £1,794.00
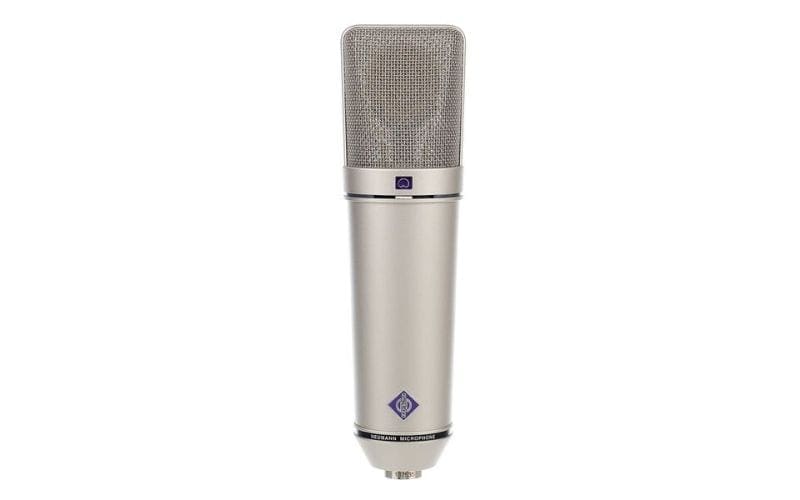
First introduced in 1967, this is arguably the most recognisable large diaphragm condenser microphone. The current model uses the same capsule as its sought after predecessor, but recent circuit modifications give it a higher output level and lower self noise.
The U87 comes with a three way polar pattern selection switch: omni, cardioid and figure- of-8. This model is well known for its near flat linear frequency response in both cardioid and figure-of-8 positions. Benefits include a single low cut filter option, and a pad switch that gives -10dB of attenuation. With the pad engaged, the U87 can handle a max SPL of 127 dB.
This microphone, however, doesn’t introduce any additional features we haven’t yet seen. In fact, it has less options than C-414 or the Aston Spirit. The U87Ai’s legacy is built on its quality and reputation, which is the real selling point. There are many large diaphragm condenser microphones available at a lower price, but the U87Ai’s consistency makes it an optimal choice for engineers and producers. The frequency response makes it ideal for lead vocals and capturing the subtle nuances of other acoustic instruments. Its tapered roll off from 15kHz upwards means that it is less susceptible to sibilance (where the consonants ’s’ and ’t’ can become unnaturally emphasised).
Rating 3/5
Summary – How To Use Condenser Microphone
As a summary, the AT2020 is a great budget level option, and the sE2200 provides further functionality (both are fixed cardioid patterns). Not a huge problem if you are recording straightforward vocals or acoustic guitar tracks – but you may wish to explore the more feature-heavy options at some point later down the line.
The C414 is a veritable Swiss army knife (Austrian to be precise), and its higher price point reflects this functionality. The AKG 414 is a workhouse for multiple applications, and its rugged build makes this a great mic. The choice between a darker XLS and the brighter C414 version may be a sticking point for some, and the cost will deter others.
Whilst I love the sonic characteristic of U87Ai, it is beyond the budget of most enthusiasts. The quality control that Neumann employs is exemplary, however, when you compare the 5 mics, it just doesn’t warrant the expense.

Overall Choice
My overall choice on account of value for money, functionality and sonic excellence is the Aston Spirit condenser microphone. This microphone is a standout! It delivers so much for price, plus its innovative design is both practical (the unique wave-form structure allows the grill to distort and then be returned to its normal position) and aesthetically unique.
It is always advisable to find a way to try a mic out and see how it suits you before making a purchase. Think carefully, as the voice, the recording technique or the specific application a mic is needed for will vary from person to person. For peace of mind, it is always best to see how the mic that you have set your sights on responds to your personal needs before you commit to it. You should also check out our guides to cheap studio monitors or studio headphones.
Now that you have hopefully found your ideal microphone, we can’t wait to hear the amazing vocals and songs that you will be recording! Allow us to help you amplify your music, collaborate with others, and even get your music in TV, film and more. Why not try Мusic Gateway for free?


