The EQ [Equalizer] is one of the most used tools in the mixing toolbox. It can be confusing and maybe even daunting if you are new to music production or audio engineering. This post will demystify and explain what EQ in music is, what the components are, how they work, how to EQ instruments & how to use EQ in mixing.
EQ Meaning: What is an EQ in music?
Ever asked yourself what does EQ stand for? Well EQ definition means that it is simply an abbreviation for Equalizer. An equalizer is a software plugin or piece of hardware that allows us to shape a sound by adjusting the gain (volume) of a sound at selected points. It isn’t some mystical device doing some magical thing. It simply is a device that changes the gain of a sound at selected points in that sound. First, a couple of EQ definitions before we dive in.

How They Display A Sound
The range of human hearing goes from 20 Hz (Hertz) to 20,000 Hz (usually referred to as Kilohertz). EQs will often display a range bigger than the range that humans can hear. Just because we can’t hear it doesn’t mean there isn’t sound beyond our hearing. For example, a dog can hear between 67 – 45,000 Hz.
The specific points [20Hz, 300Hz, kHz] are referred to as frequency points, EQ points, bands or range. The range of all frequencies is known as a frequency spectrum. So when we EQ a sound we create EQ points along a frequency spectrum. These points shape a sound by changing the level [volume]. If it isn’t totally clear yet, read on!
More specifically EQ shapes a sound by changing the level of specific areas in the frequency spectrum. You can make these changes using filters (more on that in a minute).
The Spectrum Analyzer
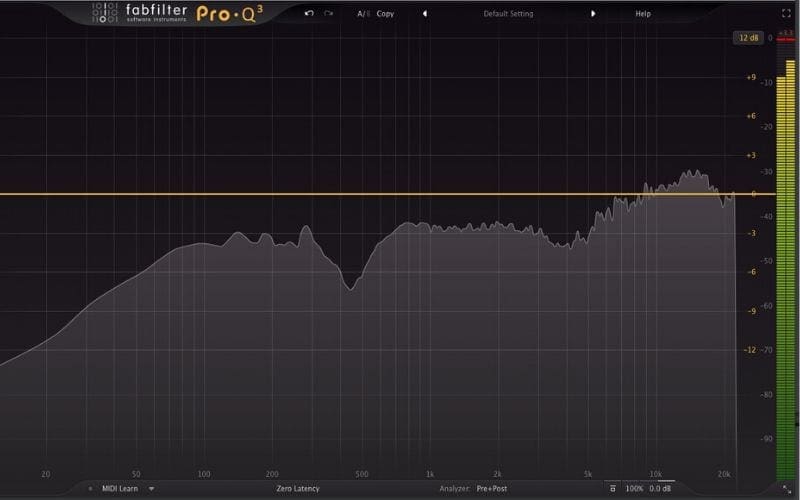
Some EQs have a screen that shows the frequency spectrum [a graph showing the full range of frequencies in a sound]. There are also hardware-modelled versions that have just knobs and buttons. When first learning, I recommend using an EQ that displays the frequency spectrum of the sound you are working on. This makes it easier to see and better understand what you are hearing. For demonstration purposes, I am using FabFilter’s Pro Q-3 but most DAWs [Digital Audio Workstations] have an EQ with a Spectrum Analyzer.
What Is A Spectrum Analyzer?
The Spectrum Analyzer works like an X-Y Graph. At the bottom are numbers that represent the frequencies in the spectrum. Along the side are numbers that represent the Amplitude (Gain) increase (above 0) or decrease (below 0) of the sound being analyzed. A Spectrum Analyzer displays the total range of the sound being analyzed.
In the next example, I created an EQ Point at 30Hz. A control panel opens showing all the options relating to the specific curve just created.
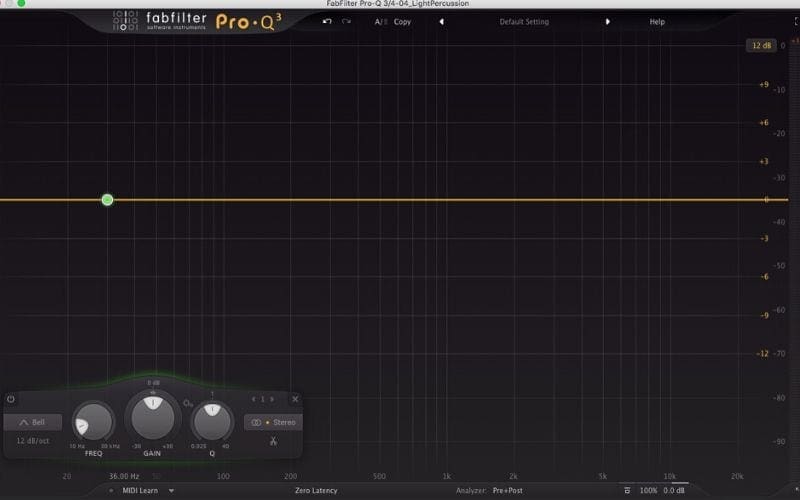
Now let’s dive into the controls!
The Controls
Most EQ plugins have the same or similar controls. The names of the controls may be slightly different but the functionality is the same. Some of the more creative EQs add additional functionality. In this post, we will focus on the main controls.
EQ Shape
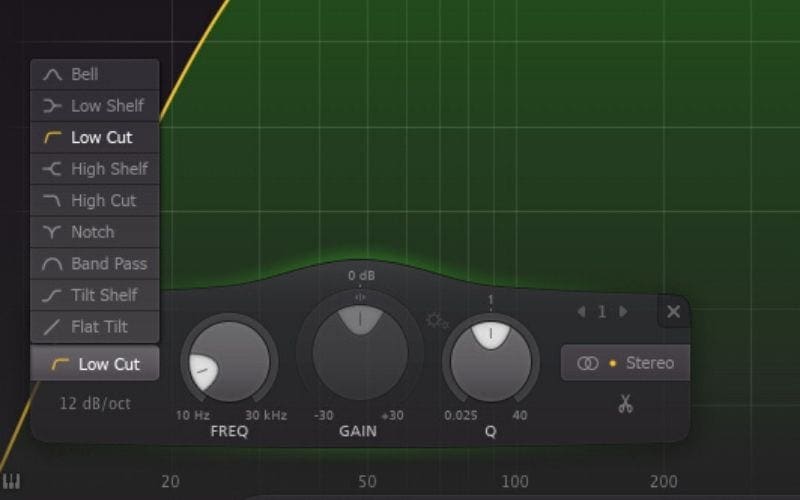
Working from left to right the first item on the control panel is the type or shape of the EQ curve. In the example below, you will see “Low Cut” displayed on the EQ Shape button. EQs use different types of curves to define the filtering that is taking place. A filter is nothing more than a range definition. The filter [range] allows us to tell the EQ where in the sound to apply equalisation. Clicking on the EQ Shape button displays the various shapes of curves available for different types of jobs. Pro Q-3 has the following shapes:
- Bell
- Low Shelf
- Low Cut
- High Shelf
- High Cut
- Notch
- Band Pass
- Tilt Shelf
- Flat Tilt
- Low Cut
Not all EQ programs will have all of these shapes. The standard shapes in almost all EQs are Bell, High, and Low Shelf, High and Low Cut, and Bandpass. Let us know if you’d like us to cover what each of these shapes does and how to use them in a future article.
Slope
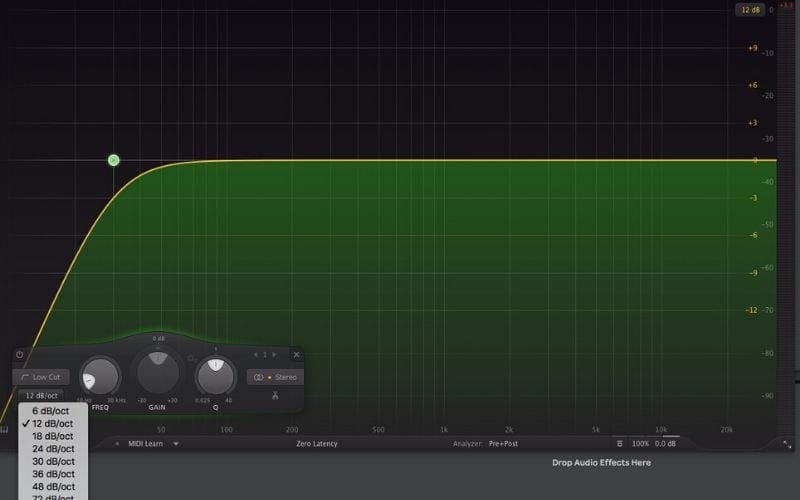
The next item is the Slope Button. The Slope Button determines how steep of a curve will be applied to an EQ shape. The slope goes from a very gentle -6dB [decibels] per octave up to a very steep -96dB per octave. The slope indicates how much of the signal of a sound will be allowed past or included in the EQ point. Setting the Slope to a small number will allow a lot of the signal above or below this point to pass through or be included depending on the filter type.
Setting the Slope to a high number will not allow much if any of the signal above or below the EQ point to pass through or be included depending on the filter type.
In the example below, by setting the Slope to -6dB I am allowing quite a bit of the signal below 30Hz to come through on this type of filter. If I set it to -96dB then very little if any of the signal below 30Hz will be heard.
Frequency
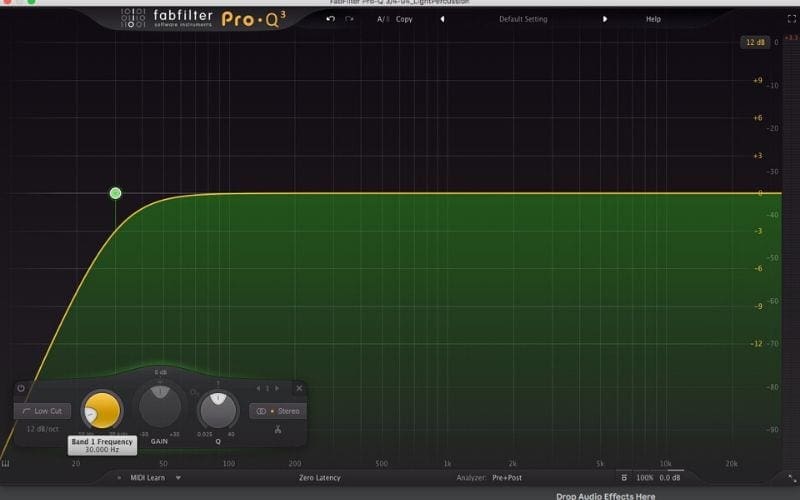
Now it is time to select the Frequency Range. This is a selected area we want to affect. To the right of the EQ Slope button is the Frequency knob [in Pro Q-3 it has the word FREQ under it]. A range is printed around the knob showing us that we can set an EQ point anywhere from 10Hz to 30kHz. Hovering over the knob indicates the exact location of this point [also known as the Center Frequency].
On a visual EQ such as this one, you can click and drag the EQ point to any location or turn the knob to the desired location. Many EQ programs allow you to double-click on the knob and directly type the Frequency as well. In my example, I have created an EQ point at 30Hz.
Gain
The knob to the right of Frequency is the Gain [Volume] knob [indicated by the word “GAIN” under it]. In Pro Q-3 you can turn the gain down as much as -30 dB or up as much as +30 dB. The default position of 0dB indicates that the signal has not been modified from the original sound. [Note: Some curves like a high or low cut do not use the Gain Knob so it will be greyed or disabled]. In the example below I am using a Bell Curve. Turning the Gain Knob to the Right (Clockwise) will increase the gain at the EQ Point.
Notice in the example below that increasing the gain at this point also increases the gain of the frequencies both to the left and right of it.
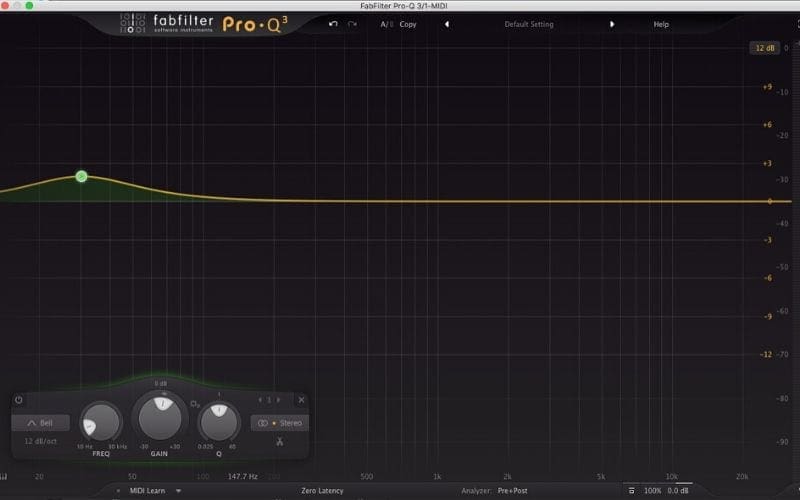
The same goes if you decrease the gain by turning the Gain knob counter-clockwise.
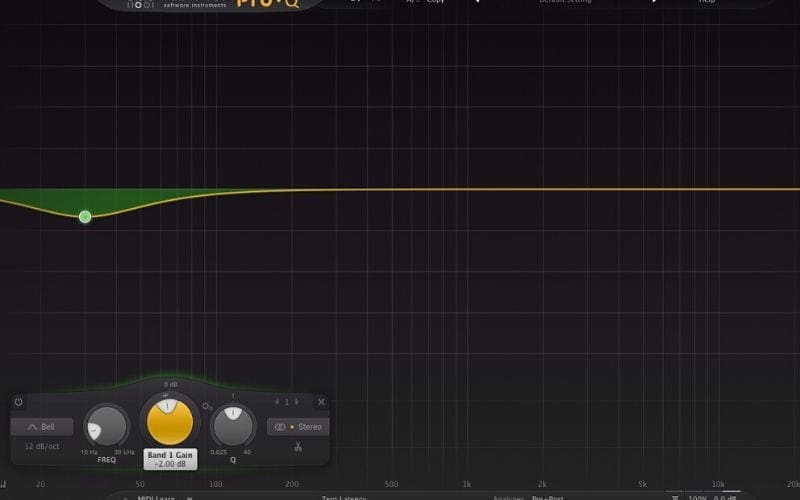
There are often multiple ways to adjust the Gain. Either by grabbing the EQ point and pulling it up or down, turning the Gain Knob or double-clicking the Gain Knob and typing in a value [ex. 2 or -2]
Q
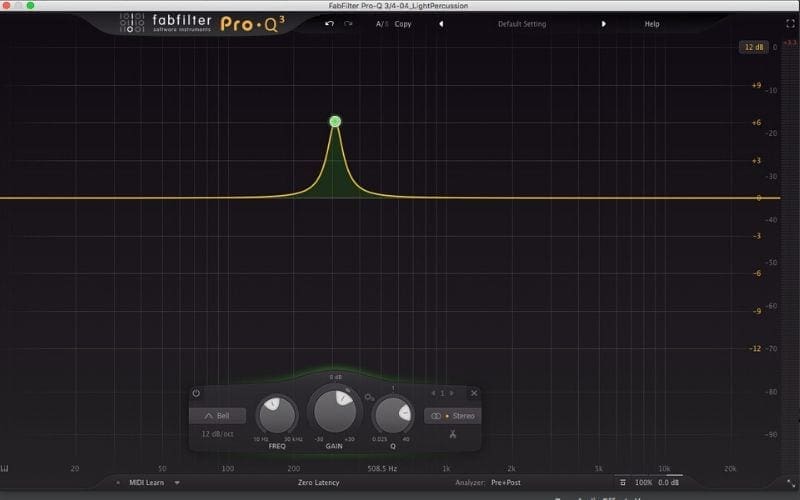
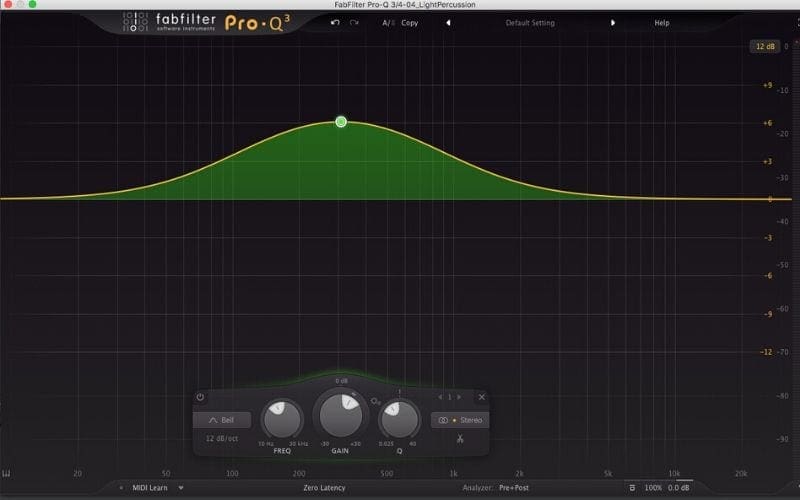
The next knob to the right of the Gain Knob is the Q Knob. Q represents the width of the filter you have selected. The Q knob lets you control the bandwidth of the currently selected EQ Point (bands). Another way of staying it is the Q Knob lets you control the width or the number of frequencies of the sound you will be affecting with the other knobs. The Q Knob in Pro Q-3 can go from .025 to 40. Turning the Q Knob clockwise decreases the width of the signal being affected:
You can increase the width of the signal being affected by turning the Q Knob counter-clockwise.
EQ Band Power Button
The final item that I will cover in this music EQ guide is the Power or On/Off Button for each band. In Pro Q-3 it is located at the top left of each Band Control Panel:
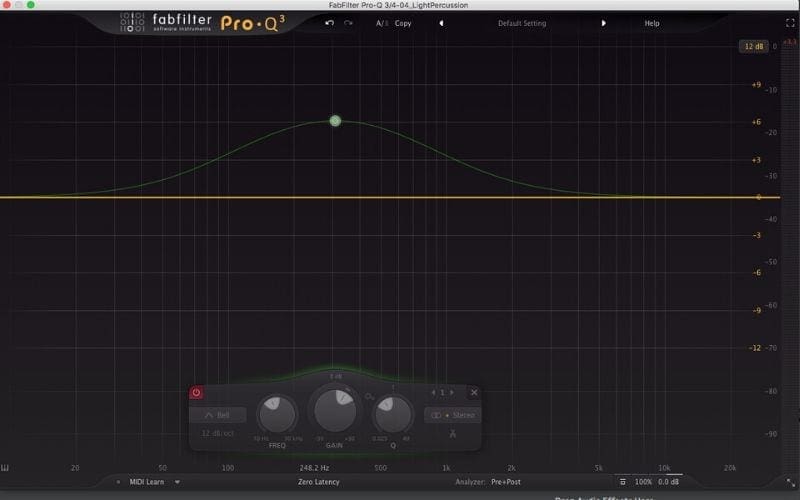
Clicking on the button will turn off the EQ for that band and the button will turn RED. Clicking it again will turn it back on. This is useful for checking how your EQ settings for that band are affecting the sound before and after. [Note: not all EQs allow you to turn off or disable each band, however, most of the graphic ones in the major DAWs do]
How To Mix With EQ – Mixing Tips: The Steps To Creating A Range:
So in the final recap here are the steps you will use most of the time when setting an EQ range:
- Select the type of filter we want to use [EQ Shape] then,
- Decide how much or how little of the signal we want to include or exclude depending on the filter [Slope],
- Select the Frequency Range we want to affect by creating an EQ point and
- Adjust the amount of the filter (EQ Shape) by increasing or decreasing the Gain.
- Use the Q to set the width of the EQ filter to only include the range of frequencies you want to affect with your settings.
- Use the Power Button on each EQ Band to hear your before and after results.
Listening Levels When Mixing
Now that we have established a method for creating EQ points I want to briefly talk about listening levels when mixing a song.
In production, we will often crank up the volume because we are in the groove and vibe of creating. When we mix, those levels can quickly cause ear fatigue, ringing in the ears and a sense that everything sounds dull. These things can cause us to make poor mixing decisions when it comes to equalisation, compression and other related tasks. The best way to avoid this is to mix at lower levels.
I suggest setting your headphones or monitors to 80 to 85 dB SPL [Decibels Sound Pressure Level – don’t worry about what it means at this point. All we need to know is that it is a number used to measure how loud the sound is in our listening environment (monitors or headphones)].
You can find an SPL Meter in the Apple or Google App store on your phone [search for “SPL METER.”] You then play your track [or a reference track] and the SPL Meter will measure the loudness of your listening environment. Turn the gain down on your audio interface or DAW until the SPL Meter reads between 80 to 85.
If you haven’t worked at this level it will sound REALLY quiet. But the more you work at this level the more sensitive your ears will become. I have found that over time I can hear finer details by mixing at this level. I can also mix for longer periods of time before my ears fatigue.
EQ Takes Practice and Patience

Mastering EQ is something that takes time. At first, you may not hear some of the changes in the sound when you turn knobs. That is natural. The more you practice the better you will be and you will hear more detail in your mix!


