A template is a pre-designed or configured guide used for the creation of some kind of project. In DAW Ableton Live, the template can be used as a means to simplify the creation process, eliminate repetitive tasks, or act as a guide for creating and arranging a song. The Default Ableton Template is usually what we see when we launch Live, and is the very basic idea of a template. Read on to find out how to make a template and what different types of Ableton Template Projects there are!
What Are Ableton Live Templates?
The Ableton Live Template is a project file created, configured, and saved for future use. It is the same file type used for a song project. The template is customised (as you will see) so that it can be used with every new song you create. It usually doesn’t contain a full song as far as MIDI and audio, but it can contain common elements used in most tracks (A MIDI kick or hat pattern or an audio file sweep, for example). We can use the template repeatedly (saving the new song with a new project file name). The Default Project Template is a project file that Ableton opens every time we start Live.
The Ableton Live Default Template Set
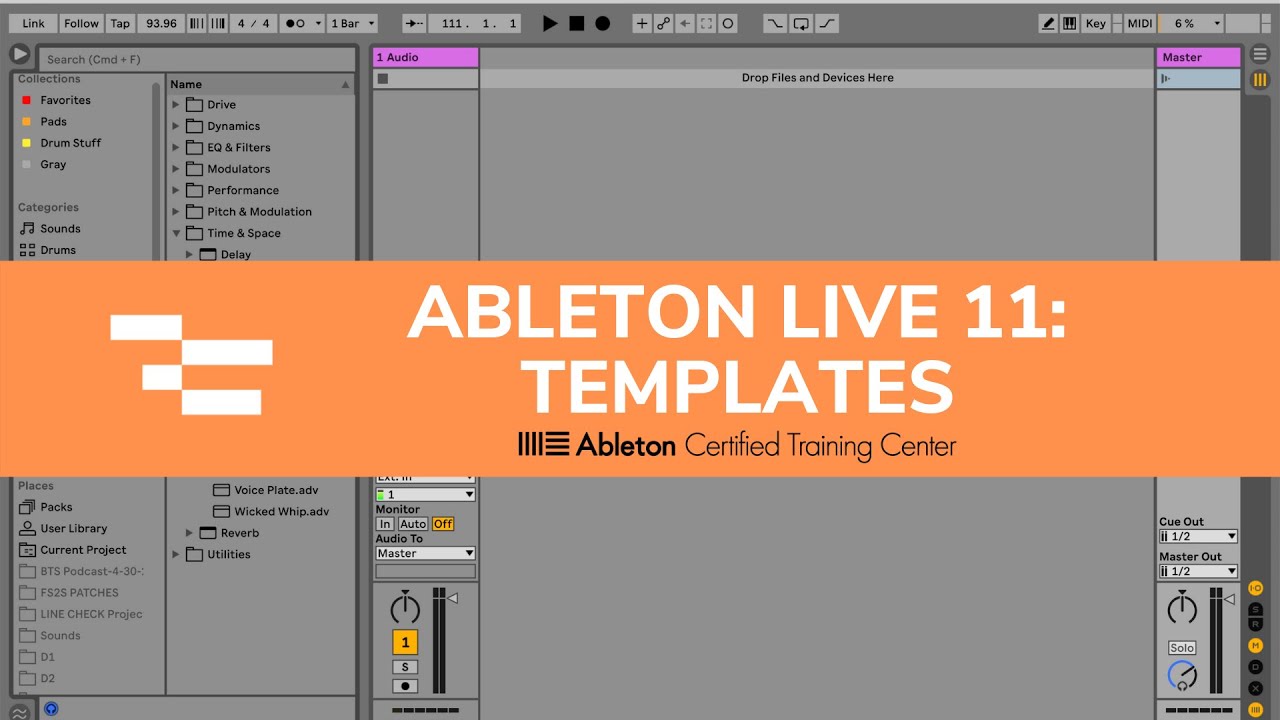
When you launch Ableton Live, the Default Project Template loads. The Default Template Set is available in both the Session and Arrangement view.
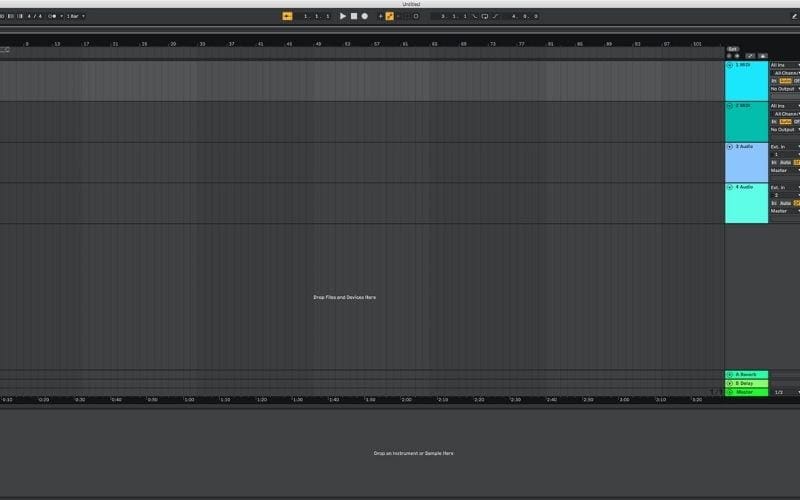
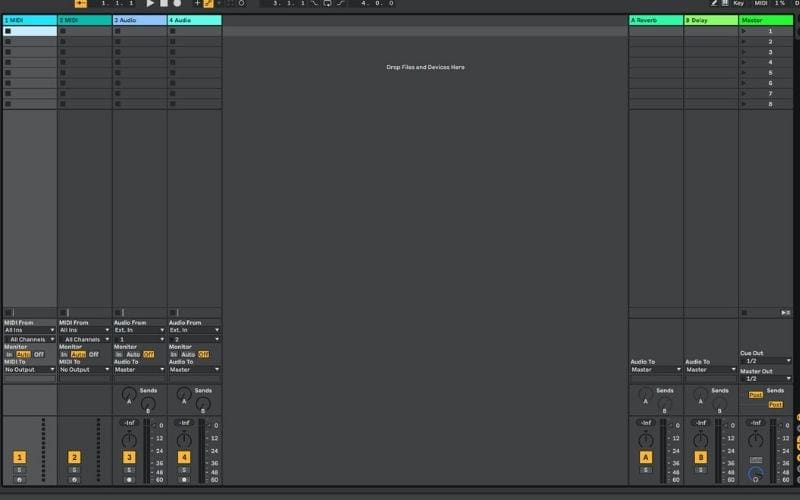
The Ableton Live Default Template includes 2 empty MIDI tracks and 2 Empty Audio Tracks. At the bottom are also 2 default Return Tracks – A Reverb and B Delay. Also included is the Master Channel.
Ableton Live Templates – Saving A Default Template
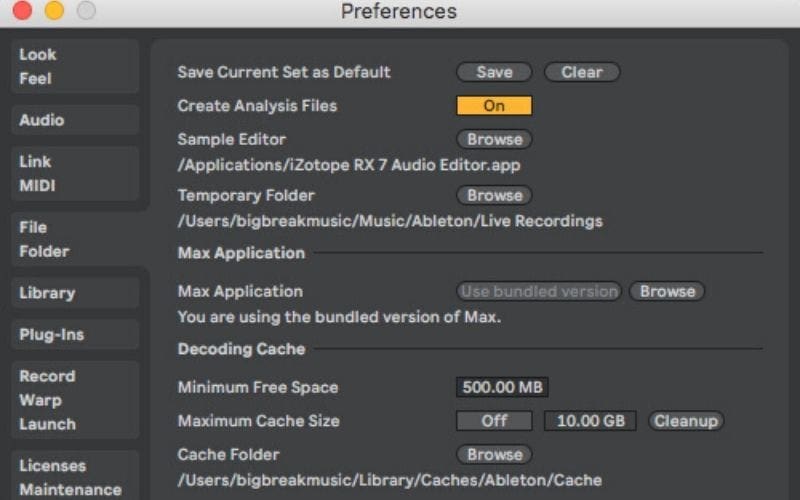
We can customise the existing Default Template that loads when Live is launched by going to the Live menu, selecting ‘Preferences’ and navigating to the ‘File Folder’ tab. The first item on this menu is ‘Save Current Set As Default.’ Clicking on ‘Save’ will save any changes made to the original template as the new Default Template. When you open Live, it will open with this new template. It will also load this template when you select ‘New Live Set’ from the File menu. You can select ‘Clear’ next to ‘Save Current Set As Default’ to reset the Default Template back to the original template.
Template Management In Live
Let’s look at a few of the functions in Live for template management.
Saving A Template
Once we have a template that we like (and it isn’t one that we want to save as the Default Template), we can save it to the ‘Template’ folder in the Ableton User Library. If there isn’t a Template Folder, you can create it.
Tip: An easy way to locate the User Library is to right-click on the User Library folder in the Ableton Live Browser and select ‘Show in Finder’ (‘Show in Explorer’ on Windows). You can then add the ‘Templates’ folder).
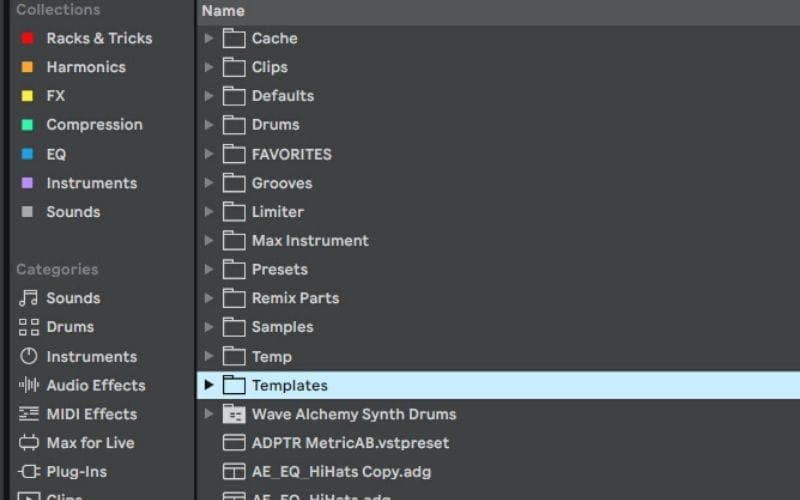
After creating the folder, it should appear in the Live Browser window. If it doesn’t, click away from the User Library folder to another folder and click back. If that doesn’t refresh the view, close and relaunch Live.
Loading A Template
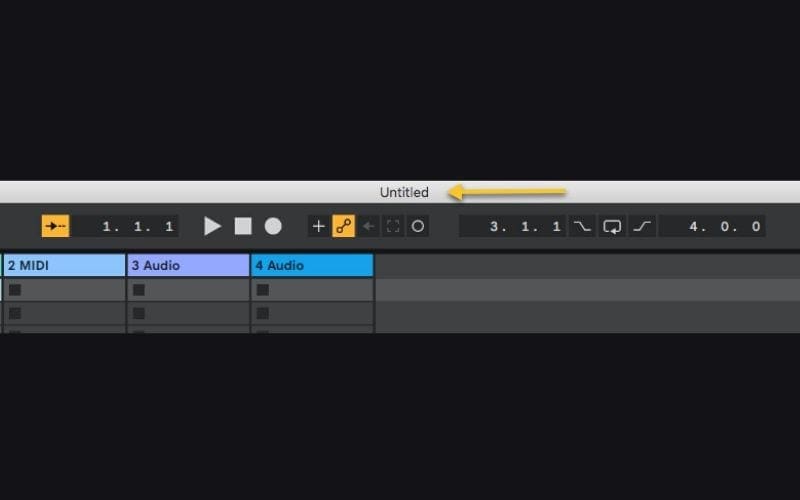
Loading a template works the same way as loading a project. You can navigate to the Template folder in the User Library and open a template, or double click on a template from the Ableton Browser. When the template loads, it will have no song name. You have to save the template as a new project (song) in the ‘Live Recordings’ folder. The template will remain unchanged ready for the next time it is used.
Loading The Original Default Template
There are times where we don’t want to load our default template but, instead, we want to load the original template that was installed with Live. With Live open, go to the File menu and hold down the SHIFT key while clicking on New Live Set. I use this when I want to test a new plug-in and don’t need a whole template. This is also useful for those times when you want to get a musical idea down fast.
Returning The Default Template Set To Factory Setting
To return the template set to the default factory setting, delete the existing “Template.als” file in this location: (Note: These folders are hidden by default).
Mac: /Users/[username]/Library/Preferences/Ableton/Live x.x.x/Template.als
Windows: \Users\[username]\AppData\Roaming\Ableton\Live x.x.x\Preferences\Template.als
Now that we have explored the Default Template, let’s look at other types of templates that we can create.
How Does Using Templates Help?
We can create any type of template that we need. The idea for the templates below is that they fill some or all of the following needs:
1. Simplify and speed up the production/mixing/mastering process by eliminating the need to recreate the same thing in every song (Tracks, Groups, Busses, Return Tracks, Midi Parts, Audio Files, Racks and Instruments that are commonly used etc.)
2. Allow for enhanced creativity by maximising the focus on creating and not on the administration and technical part of making music
3. Removing technical items and including musical items like favourite synths and plug-ins that are pre-configured and loaded means that you will be ready to go.
Ableton Live Templates – Types Of Templates To Create In Live
Workflow Templates
These are used to configure a session so that it provides the greatest flexibility whilst minimizing repetitive and technical tasks. The Default Ableton Template falls under the Workflow Template category.
The workflow template is a ‘living template’. This means that it is a template that constantly changes to fit our current work needs. I pay attention to the things that I do repetitively when producing, mixing, or mastering. Most repetitive actions can either be templated or automated via a macro/hotkey. Any action that I am performing repeatedly in a session or from session to session is added to a template if at all possible.
What Kind Of Workflow Templates Can We Create?
We can create templates for a variety of uses including:
- Production, Mixing or Mastering
- Songs with 8, 16, 32 tracks or more
- Ones that have our favourite and often used plug-ins like Synths, Drums, FX, etc, regularly used racks and instruments
- Templates with groups and busses to speed workflow
- Ones for scoring film or TV
- Genre or song style-specific templates
The possibilities are endless. Anything that can speed up a workflow and assist us in making more music is a perfect candidate for a template!
Ableton Live Templates – Items to Consider Adding to a Workflow Template
Below is a list of some of the things I add to a workflow template:
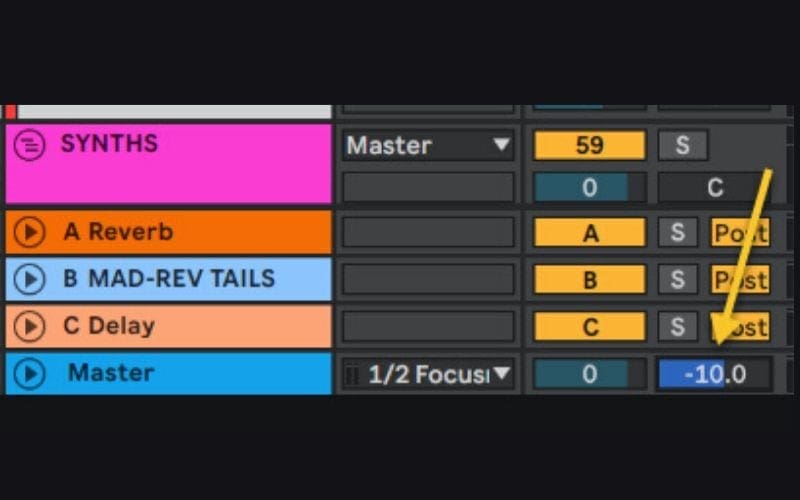
Cue Level
Set the Cue Level so that it isn’t as loud. The Cue Level is the audio level for the clips and samples you play via Ableton’s Live Browser. This is helpful in keeping the sound of the samples you are auditioning to a level similar to the track that you are working on.
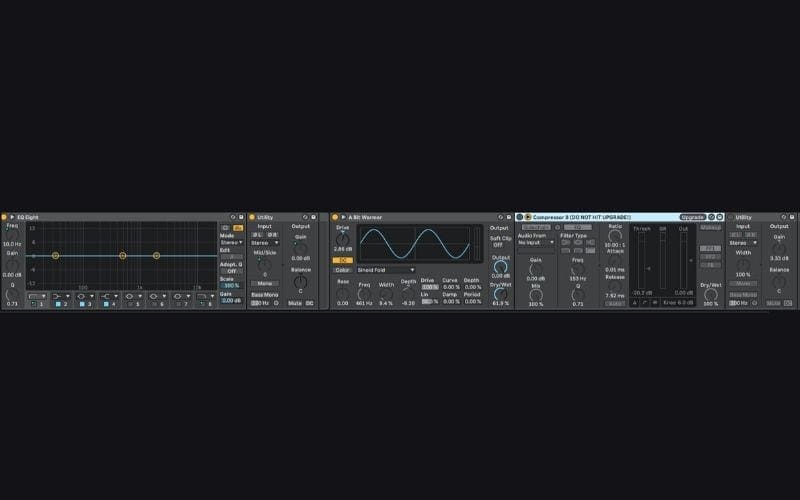
Track Defaults
Add a default group of plug-ins (or a rack) that I use on every track. I have a default track rack with an EQ, Saturator, Compressor, and Utility. I know that I am going to use these on most tracks, so I load it on every track.
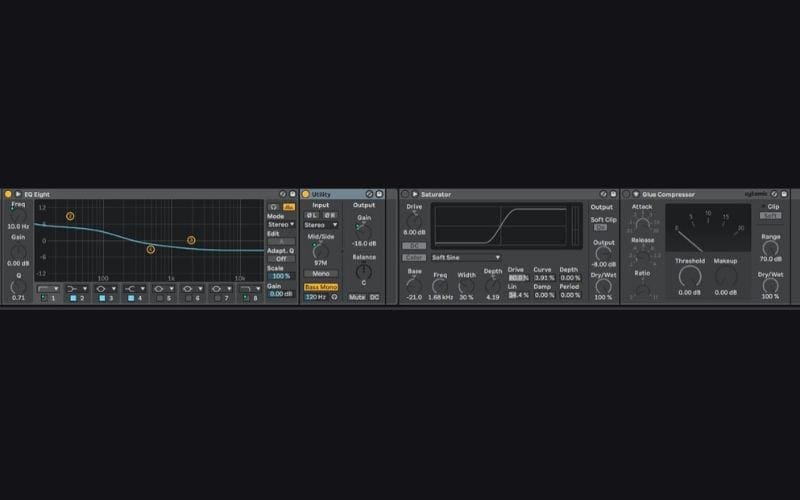
Group Defaults
Add a default group of plug-ins (or a rack) that I often use on Groups. When mixing I will almost always use a Glue Compressor to gel the sound, and often an EQ, so I add those to each group.
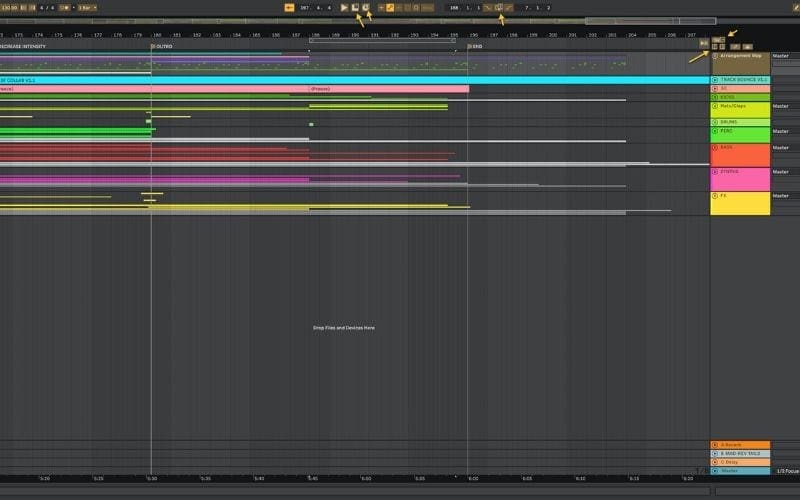
Keys Mapped To Repetitive Functions
When working on a track, I use the mouse as little as possible as this slows down the workflow. Some of the keys I map include:
- Go to the start of the track: This way, I can hit that key a single time and it repositions the play head to the beginning of the track.
- Adding a Marker: I have a key mapped to the ‘Set’ function so that I can tap it and create a marker at the playhead position. This makes it fast to add markers on the fly with the track playing.
- Recording: Rather than using the mouse, I have the Global Record Button mapped to a key so that I can quickly punch in and out of recording or record on a track without having to take my eyes off of the midi keyboard or track.
- Advance to the Next Marker and Back to the Previous Marker: I have keys mapped so that I can jump to the next or previous sections based on maker position.
Toggle Master Buss Plug-ins
In a larger session, to get to the Master Buss, I have to scroll down and then click on it. Then I have to find the plug-in I want to disable, click on the On-Off button, and scroll back up to the track I was working on. Instead, I map the plug-ins I want to toggle on and off with a mapped key or keys.
Below is an example of Live in Key Mode. I have pointed out some of the keys that I have mapped.
Efficient Group and Buss Management
Creating tracks and grouping them as well as creating busses and Return tracks is a repetitive task. So I have added these to the Workflow Template:
I create a Group for each major element of a track (percussion, bass, vocals, fx, etc).
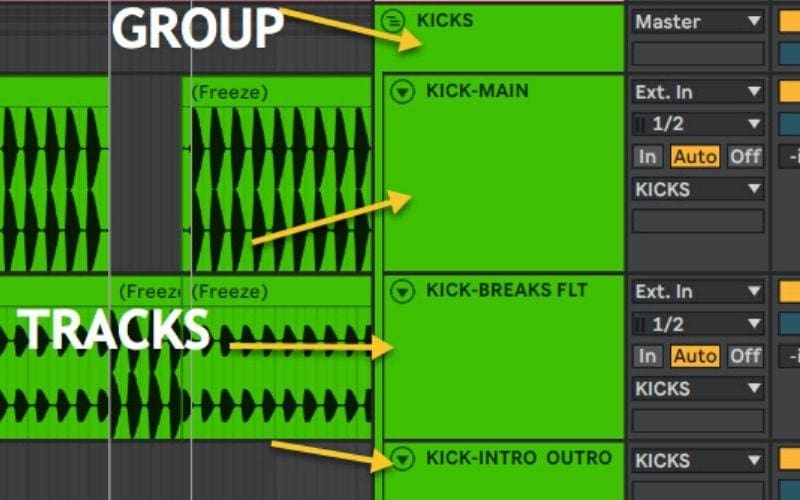
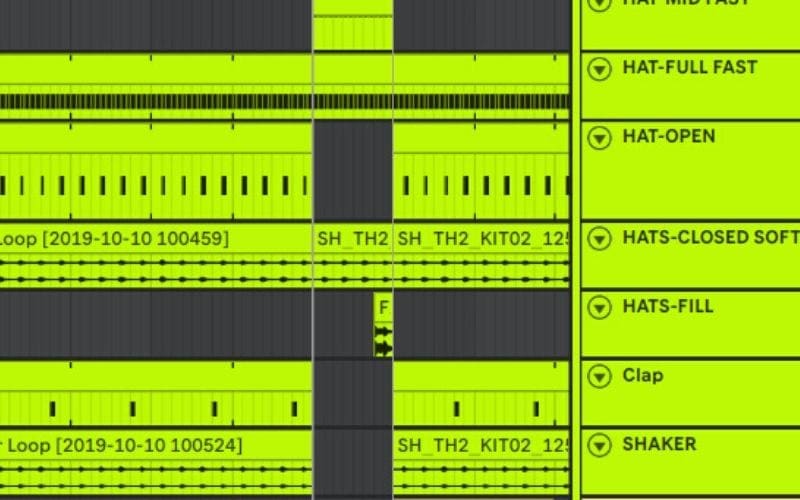
Within each Group, I will create one MIDI and one Audio track. I also may create pre-defined tracks that I use frequently like the one shown below:
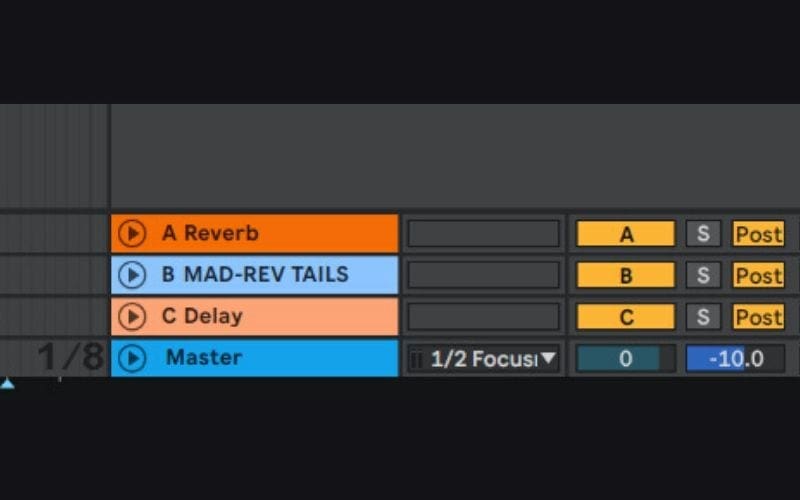
Next, I create Return tracks for Reverb, Delay, and a couple of special effects chains. The Default Template includes a Reverb and Delay Return. You can change the stock Reverb and Delay to a different plug-in or add more plug-ins to them like Saturation and Distortion.
The next type of Templates I will look at are Ghost Templates.
Ghost Templates
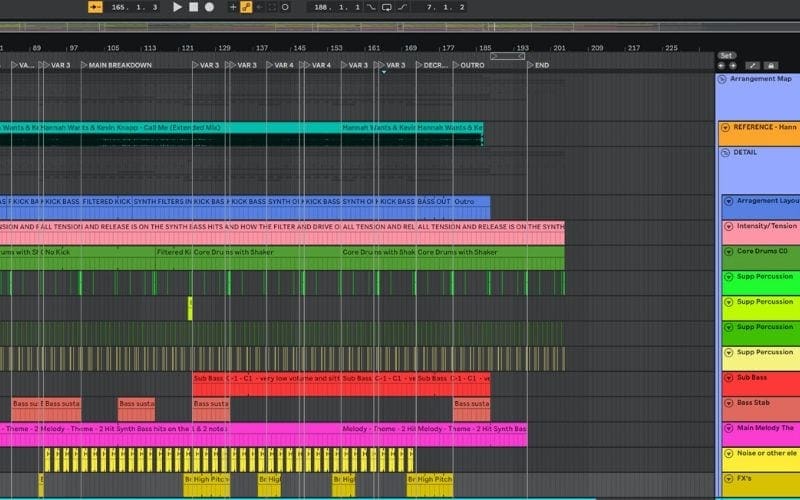
These templates provide an arrangement structure, along with an in-depth analysis of a reference track that the ghost template is created from. These templates assist in arranging a song that fits a particular genre or style. They also are great when we feel a little stuck.
Ghost Arrangement Templates
Ghost Arrangement templates are designed to provide a detailed analysis of a reference track. I personally like these, as it gives me great insight into the production process of a particular song.. Usually, I will load a reference track in my DAW and analyse it in detail. By creating MIDI tracks and adding empty blocks, I can mark where elements of a song come in and out.
Another great use of a Ghost Arrangement Template is that it can be integrated into an existing project! Ghost Arrangement Templates are fantastic when it comes to assisting with laying out a track. You can match it to an existing song by dragging the various elements in your production to the corresponding elements in the Ghost Arrangement. I find this helpful when I am nearing the end of production. For example, I have a deadline for a record label and am finding it difficult to get those final elements in the right place. I will load a Ghost Arrangement Template and drag the elements in my production to match the template. I can then drag the elements around the area of the Ghost and find a place that works.
Royalty-Free Production Templates
These are templates created by commercial companies and are usually full songs. Often, these songs are loosely modeled on existing successful tracks, imitate a particular artist’s style, or a record label’s sound. This type of template offers great educational value. We can learn various production and mixing techniques from studying these templates, and even use the MIDI or sounds and presets to create a new track. They also provide a great starting point for learning a new genre or style, and learning the nuances and common elements of that genre or style. Let’s take a closer look at each of these.
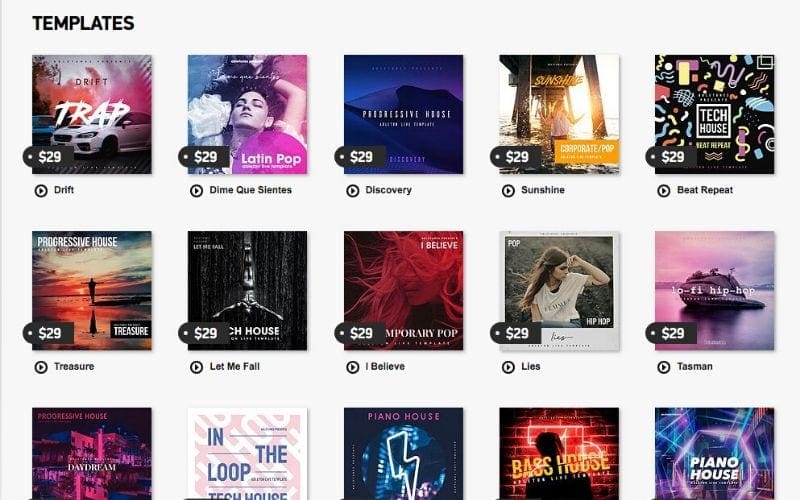
Commercial, Royalty-Free Templates
The commercial, royalty-free templates are created by some of the best ghostwriters in the business (if you know where to look). There are lots of sites that offer these, and some make it their entire business. These templates are designed to inspire new ideas or imitate the vibe of a popular song. Commercial, Royalty-Free Templates are a great way to learn about a genre and the production style associated with the genre, gain insight into sound design and sample use, learn new track production and arrangement tips and jumpstart a new production with these ideas.
IMPORTANT: While these sites often state that the licensed templates are ‘royalty-free’ and can be used in commercial production, read the fine print! Some licenses are royalty-free for personal use and require you to pay additional license fees if a track is released commercially or signed to a record label.
Ableton Live Templates 11 – The Latest Version
Ableton Live 11 is a powerful and intuitive music production and performance software. It is designed to help producers and musicians create, record, mix and perform their music in a professional and creative environment. The template includes a comprehensive range of effects, instruments, and tools to help you create high-quality music.
It also includes a range of features to help you collaborate with others, including real-time collaboration, MIDI and audio recording, and the ability to share projects online.
Ableton Live 11 is an excellent choice for both beginners and experienced producers alike.
Conclusion – Ableton Live Templates
Ableton Live Project Templates should be used and integrated into everyone’s workflow. They save a huge amount of time and increase creativity. I hope that the tips above have been helpful in saving you time, and creating smooth and stress-free tracks that you can be proud of! Also, check out our article on free Ableton sound packs to help you find the right elements for your track!
So, now you know how to use templates in Ableton to perfect your music-making process.

